Raise3D E2
|
Raise3D E2
|
|
|---|---|
 |
|
| Status: Active | |
Superusers
- Reese Snook (rsnook@terpmail.umd.edu)
- Ivan Penskiy (ipenskiy@umd.edu)
Overview
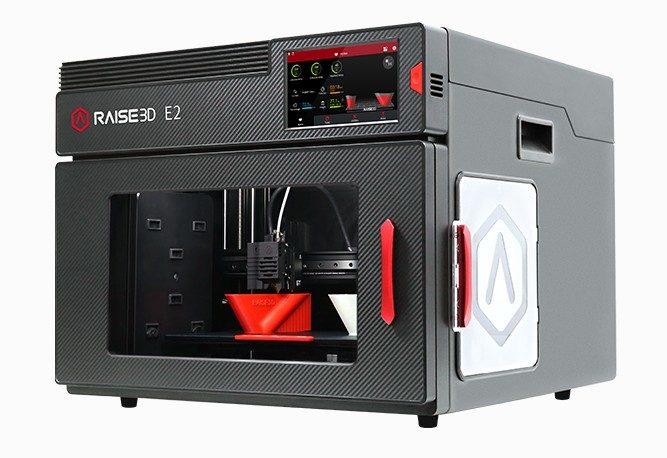
Raise3D E2 is a professional-grade, dual-extruder 3D printer designed for precision, reliability, and ease of use. It features an independent dual extruder (IDEX) system, allowing for mirror and duplication printing, increasing efficiency in production and prototyping. With a build volume of 330 x 240 x 240 mm, an enclosed chamber, and an auto bed leveling system, the E2 ensures high-quality prints across a variety of materials, including PLA, ABS, TPU, and carbon-fiber-reinforced filaments.
Location
E.A. Fernandez IDEA Factory (Bldg. 228), room 3119.3D printer specifications
| Max print volume (W × D × H) | – single extruder print: 330 × 240 × 240 mm (13 × 9.4 × 9.4 inch) – dual extruder print: 295 × 240 × 240 mm (11.6 × 9.4 × 9.4 inch) |
| Layer height | 0.02 mm - 0.25 mm standard layer height: 0.25mm |
| Supported materials | – common: PLA, ABS, TPU, PETG, ASA – uncommon: HIPS, PC, TPE, NYLON – with supervisor approval: PP, PVA |
| Maximum print head temperature | 300 °C |
| Maximum heated bed temperature | 110 °C |
| Accepted file types | .obj, .3mf, .stl |
Important documents and useful links
- Official user manual
- ideaMaker slicer manual by Raise3D
- Basics of FDM printing guide by All3DP
- Download ideaMaker slicing software
Reservation
Raise3D E2 must be reserved before using. The reservation is done using the Google calendar. Users will be able to reserve the equipment personally after attending the RAL lab orientation and then following the steps below to gain access to the equipment.
Video demonstration
The following videos demonstrate capabilities and the some aspects of operating the Raise3D E2 printer:Important reminders and safety
- Some parts of the printer get very hot during operation and take a while to cool down. Be careful when removing the printed parts or doing work inside the printer.
- Make sure to log the print and the amount of material used.
Designs can be made in any software capable of saving models in STL format (e.g. Onshape, AutoCad, SolidWorks, ProE, etc.). The on site computer station is meant for operating lab equipment only. Do not work on your CAD models here, your files can be brought over on a flash drive or wireless method.
Remember to set the appropriate tolerances in your STL files: tolerances should be smaller than the smallest feature in your design. Don't make tolerances much smaller than 3D printer resolution. Also, be mindful that small tolerances produce larger files.
- Guide to tolerancing for 3D prints
- Design for 3D printing guide by All3DP
- Visual troubleshooting guide
3D printing conceptual guides
- 3D printer anatomy, youtube video
- 3D printing basics, youtube video
ideaMaker is the required slicing software for using the Raise3D E2 printer in the RAL lab. It is pre-installed on the lab's computer and can also be downloaded for free for use on a personal PC. The following instructions guide you through the installation process.
Export the designed 3D models into a compatible format (e.g. stl) and open them in ideaMaker for slicing and print preparation.
Preparing for slicing
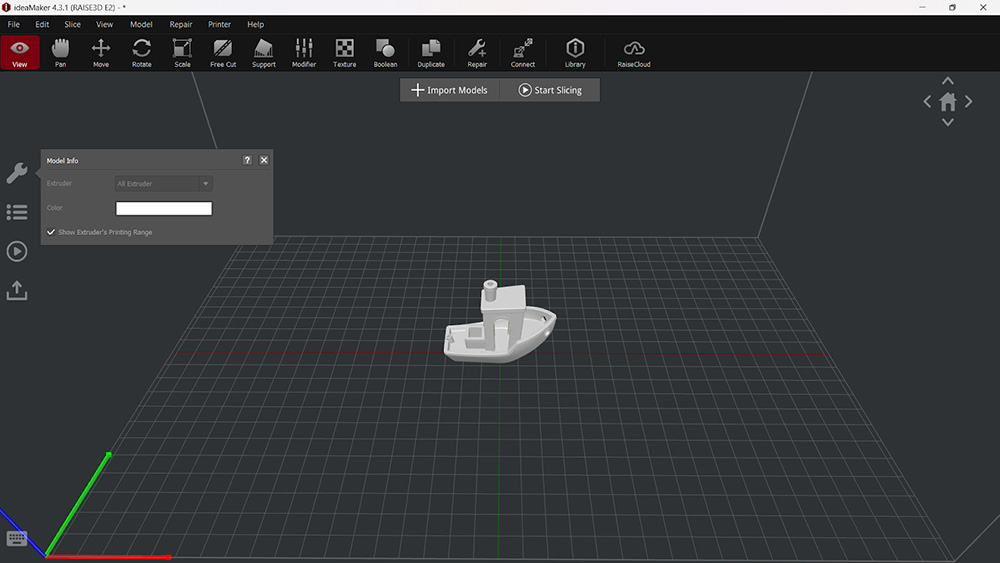
Basic toolbar tools

- View: used to view model and navigate, selecting a model will let you know which extruder will be used for that model. By default that is always the left extruder. Note that the same camera navigation is available regardless of tool. Extruder selection is the only unique feature.
- Move: use to move the model around; can also use axis arrows on the model. Selecting the Move tool you can also Arrange all Models to fit on the build plate if possible.
- Rotate: drag rings on object or use button to lay object flat.
- Scale: change size of object; use object dimensions, scale percentage, or arrows on model.
- Free cut: separate model using a guide plane.
- Duplicate: add copies of models.
Quick orientation change
- press shift + L to select a face on your model to lay flat to the surface;
- press shift + A to arrange all selected models on the build plate.
Slicing
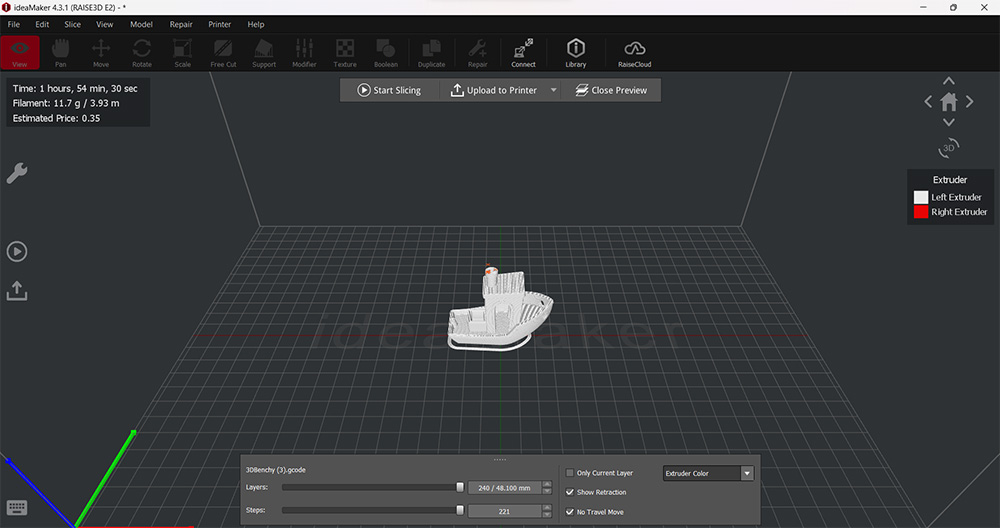
Click Start Slicing to begin slicing.

Select the filament for the Left Extruder:
- for PLA select [Raise3D] PLA 1.75mm;
- for ABS select [Raise3D] ABS 1.75mm.
Select a quality template, which primarily affects layer height and print speed. To customize template settings, click Edit to open the Edit Template interface.
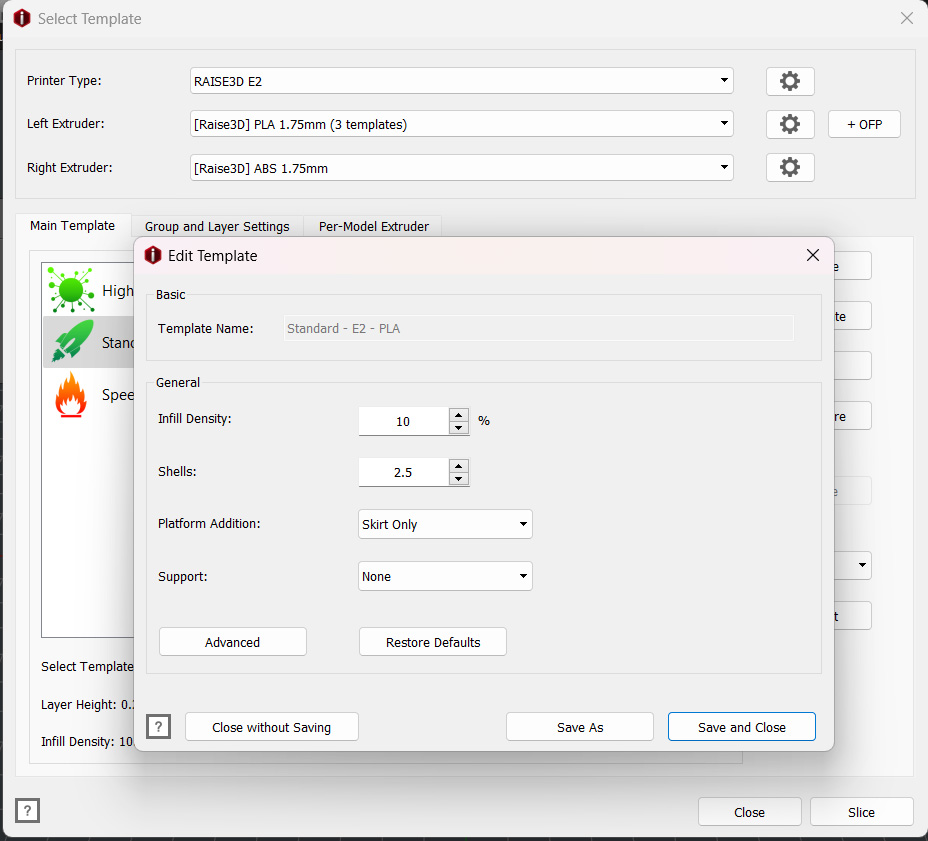
In each template preset you can adjust:
- Infill Density;
- Shells: number of outer perimeter walls;
- Platform Additions: first-layer enhancements, such as a Brim or Raft, help improve bed adhesion and print stability;
- Support: temporary scaffolding-like structures used to support overhangs, bridges, and complex geometries during printing.
Click Save and Close then Slice. If you have added support, it may prompt you to confirm you want the support to be printed.
All parts of the checklist must pass before printing.
- Tap the display to check if the printer is powered on. If the screen remains off, turn on the printer using the power switch located at the lower right back.
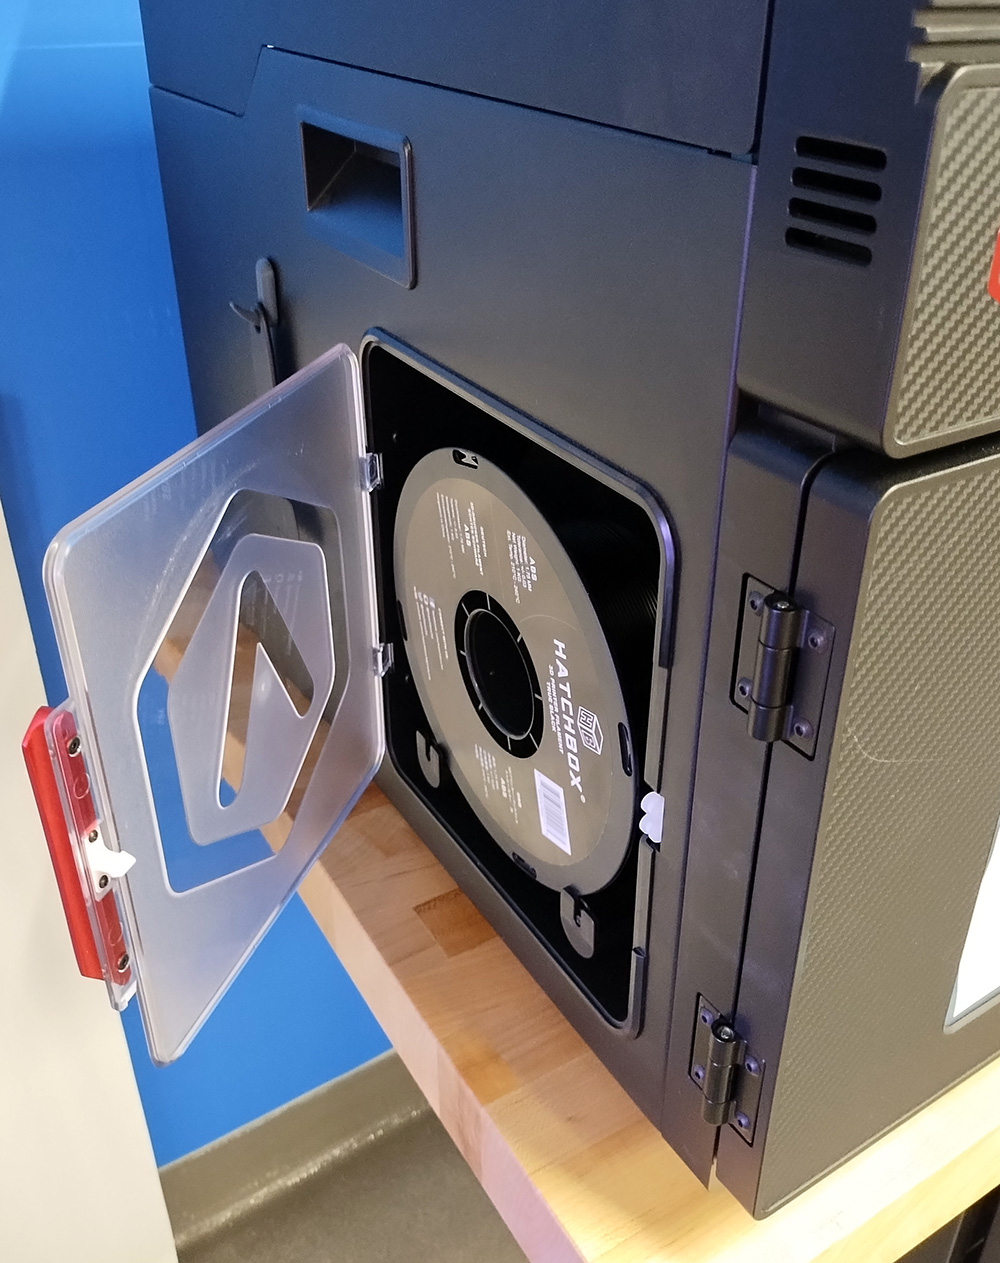
Check the printer to see if it has the proper filament loaded on the correct side (left by default).
Left filament holder Check that the flexible metal bed is properly aligned with the edge of the build plate (flexible bed should slide pass the flange on the build plate).
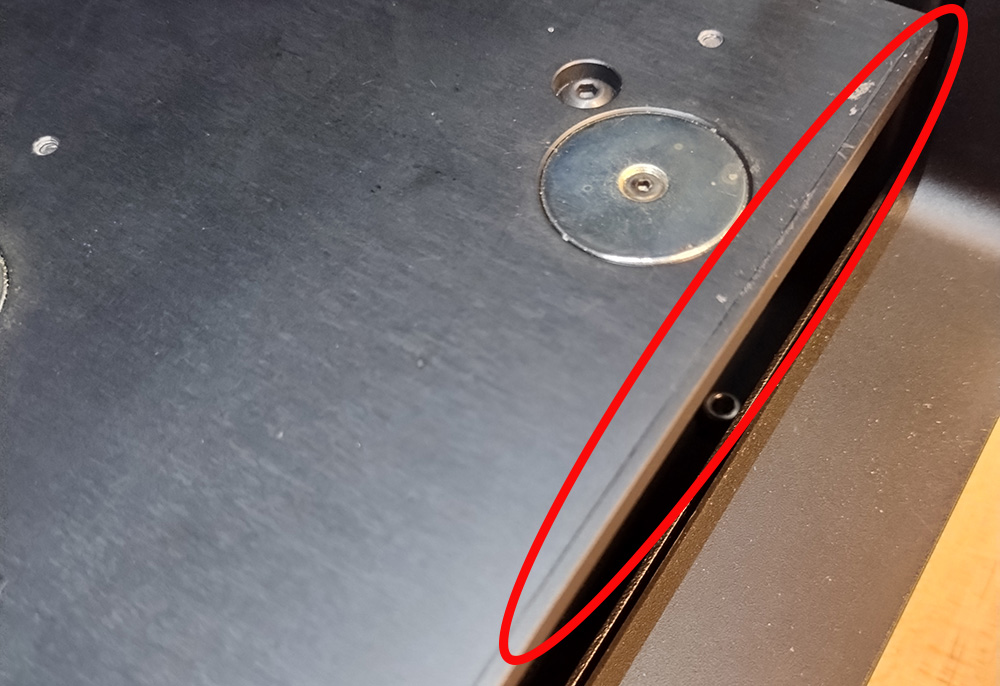
Build plate without the flexible bed. The flange is the small raise along the front edge. 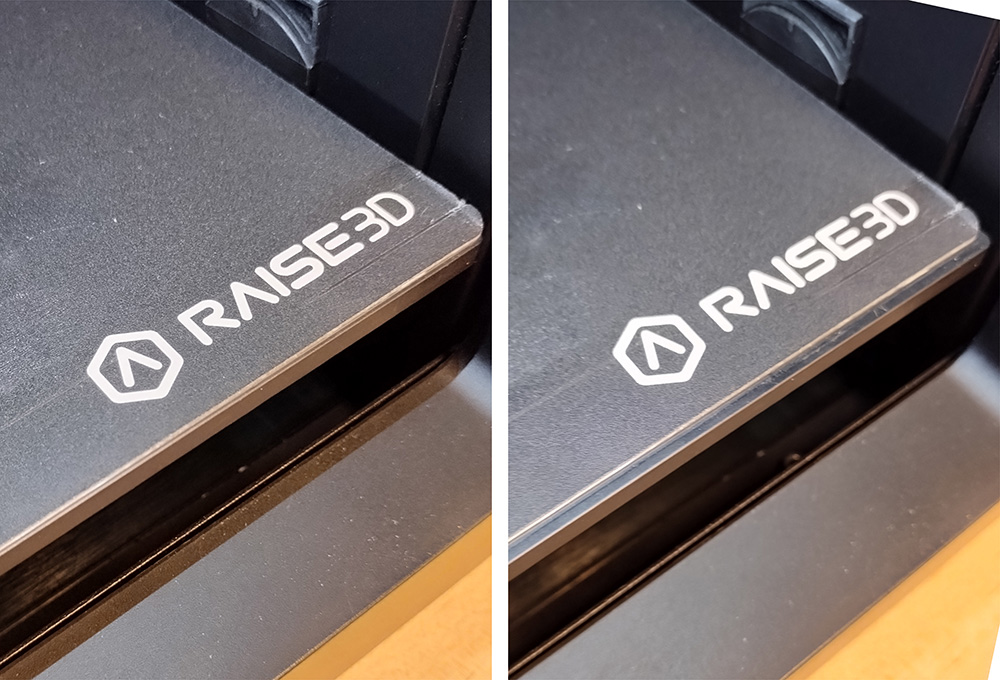
On the left is an incorrectly placed flexible bed. The bed is resting on top of the flange. On the right is shown the correct placement with the flexible bed behind the flange on the build plate. Check that the nozzle is clean.
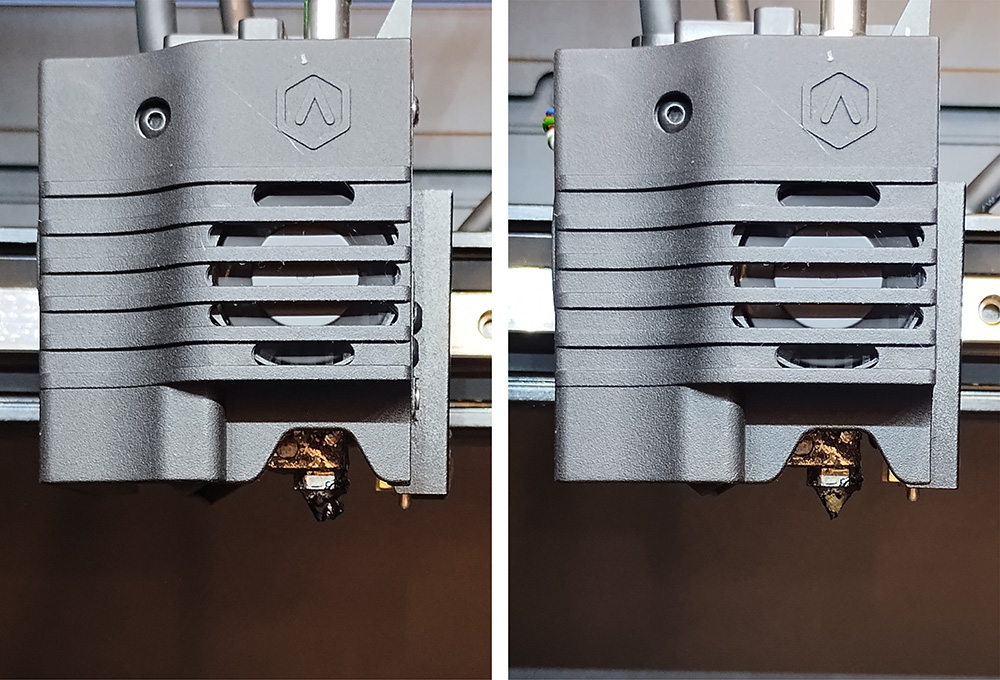
On the left is a dirty nozzle with a glob of solidified plastic on it. On the right is a clean nozzle with no globs on it.
If at least one check does not pass, ask the superuser for assistance.
- Design 3D model in a CAD software (see Design for 3D printing above).
- Export model as an stl file (see Design for 3D printing above).
- Use ideaMaker software to slice the exported stl file (see Using ideaMaker slicer above).
- Turn on the printer and go through the preprint check items (see Preprint check above).
Uploading to the printer
- If you are using ideaMaker on your own computer, make sure it is connected to the lab Wi-Fi network (RAL_wifi).
- Before you upload select Preview to make sure the correct extruder is being used, support is present where expected, etc.
- Click Upload to Printer. Make sure the printer selected is the Raise3D E2. Click Upload to send your model to the printer.
If the printer is not available, click Refresh.
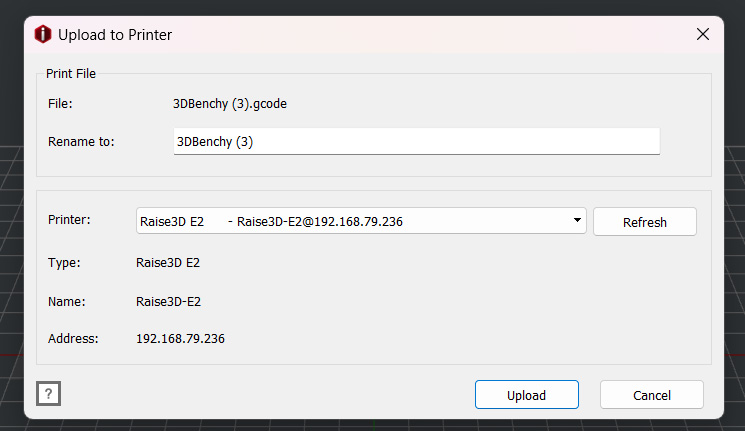
The file will be saved locally to the printer and can be accessed remotely or from the Raise3D E2 touch screen interface.
Starting the print
- Click Connect and select Raise3D E2.

- This will bring you to a remote version of the printer’s touch screen.
- To print the uploaded file click Print -> Local Storage -> File Name -> Print
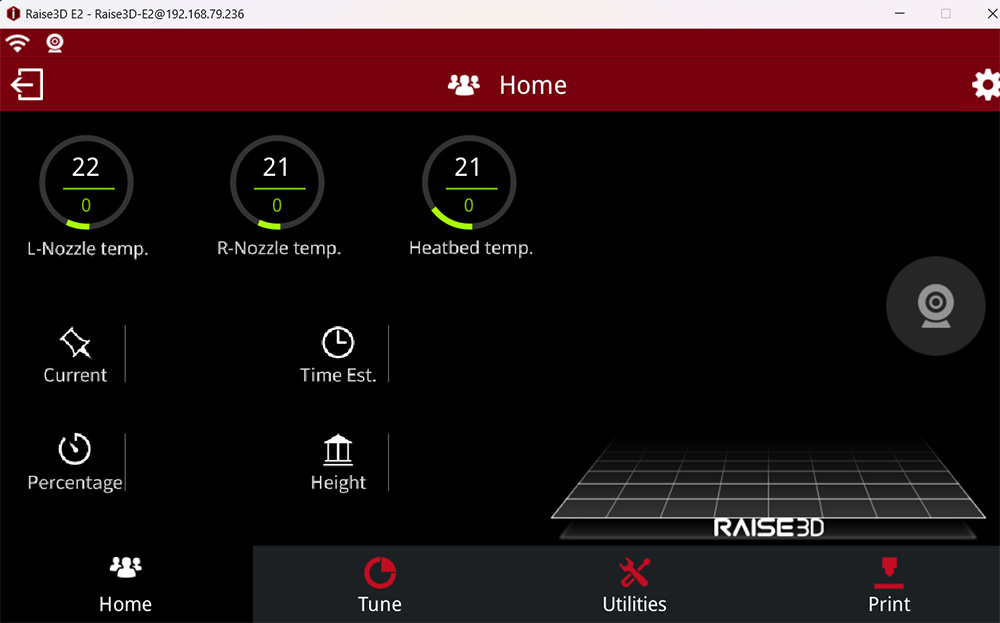
- The Raise 3D E2 will begin probing the print surface and preheating the build plate before proceeding to printing your file.
- BEFORE YOU LEAVE: Make sure that the first few layers have printed properly and there are no issues with adhesion.
- Once the job is finished click the Print Success button on the printer's touch screen.
Logging Usage
Please fill out this form to log your print job.
Removing Parts
WARNING: The build plate and nozzle may still be hot to touch and can burn you. Wait until they cool down. The current temperature of the build plate and nozzle is displayed in the printer GUI.
- Remove the flexible metal bed and let it cool to the room temperature, this will make removing parts easier.
- Gently bend the flexible bed to remove the printed parts. If needed, use a plastic (not metal) scraper to pry off the parts.
- When reinstalling the flexible bed back, ensure that it is aligned with the build plate, as explained in the Preflight Check section.
Shutting down procedures
- Ensure that no active print jobs are running.
- Flip the main the power switch located at the lower right back.
Gaining access to equipment
Read the printer's user manual and contact the lab manager (ipenskiy@umd.edu).